DIY Water Softener Installation - Step-by-Step Guide 2025 | Pearl Water Technologies
Learn how to install a water softener at home with our DIY step-by-step installation guide. Save money and time in 2025.
DIY Water Softener Installation - Step-by-Step Guide
Installing a water softener at home can save money on plumbing and service charges. The good news: with the right tools and guidance, you can handle DIY water softener installation easily.
This blog explains the step-by-step installation process in a simple way.
Table of Contents
Introduction: Why DIY Water Softener Installation Matters
Tools and Materials You Will Need
Choosing the Right Location for Installation
Preparing Your Water Softener
Step-by-Step Installation Process
Testing the Water Softener
Common Mistakes to Avoid
Safety Tips During DIY Installation
Maintenance After Installation
Cost Savings with DIY Installation
When to Call a Professional
Why Choose Pearl Water Technologies
FAQs
Conclusion
1. Introduction: Why DIY Water Softener Installation Matters
Hard water can cause scaling, stains, and appliance breakdown. A water softener solves these issues.
DIY installation reduces plumber charges and gives you full control.
2. Tools and Materials You Will Need
Pipe cutter
Wrench set
Teflon tape
PVC pipes and connectors
Hose clamps
Drill machine
Safety gloves
Having the right tools makes DIY installation smooth.
3. Choosing the Right Location for Installation
Select a spot near the main water line. Ensure there is:
Power outlet nearby
Proper drainage option
Enough floor space
Easy access for salt refilling
4. Preparing Your Water Softener
Unbox your water softener unit. Check for all parts like resin tank, brine tank, bypass valve, and drain line.
Read the instruction manual before beginning.
5. Step-by-Step Installation Process
Step 1: Turn Off Main Water Supply
Close the main valve to avoid water leakage.
Step 2: Cut and Prepare Pipes
Cut the water line using a pipe cutter. Smoothen edges for secure fittings.
Step 3: Install Bypass Valve
Fit the bypass valve to allow softener maintenance without cutting water supply.
Step 4: Connect Inlet and Outlet Pipes
Connect the inlet to hard water supply and outlet to household line. Use Teflon tape to avoid leaks.
Step 5: Attach Drain Line
Connect drain line to the softener. Ensure it leads to a floor drain.
Step 6: Add Overflow Line
Connect overflow line from brine tank to avoid spillage.
Step 7: Add Salt and Resin Setup
Fill the brine tank with softener salt. Check resin is properly fitted.
Step 8: Plug In and Set Timer
Connect power plug. Set regeneration timer as per water usage.
6. Testing the Water Softener
Open water supply slowly
Check for leaks
Run regeneration cycle
Test water hardness with a kit
7. Common Mistakes to Avoid
Skipping bypass valve installation
Using wrong size pipes
Not sealing joints properly
Wrong drain line placement
Ignoring user manual
8. Safety Tips During DIY Installation
Always wear safety gloves
Turn off power before working
Keep kids away during setup
Avoid over-tightening joints
9. Maintenance After Installation
Refill salt every month
Clean brine tank every 6 months
Replace resin every 5–7 years
Schedule annual servicing
10. Cost Savings with DIY Installation
Professional installation: ₹2,000–₹5,000
DIY installation: Free (only tool cost)
DIY saves money while giving confidence in handling the system.
11. When to Call a Professional
If you face frequent leaks
If water hardness remains same
If pipes need major changes
If the softener shows error codes
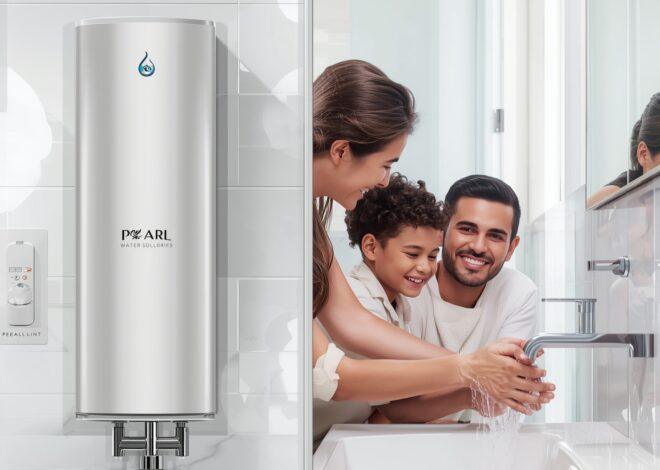
12. Why Choose Pearl Water Technologies
Pearl Water Technologies offers:
High-quality water softeners
Step-by-step installation manuals
Customer support for guidance
Affordable prices starting at ₹10,000
👉 Learn more: https://pearlwater.in/water-softeners
13. FAQs
Q1. Can I install a water softener by myself?
Ans: Yes, if you follow step-by-step guidance.
Q2. How long does DIY installation take?
Ans: Around 2–4 hours depending on experience.
Q3. Do I need a plumber?
Ans: Not always. DIY works if you have tools.
Q4. What is the hardest part of installation?
Ans: Pipe cutting and proper sealing.
Q5. Is DIY installation safe?
Ans: Yes, if you follow safety precautions.
14. Conclusion
DIY water softener installation is simple if you follow the correct steps. From turning off the main supply to connecting pipes and testing, it can be done in a few hours.
Choosing a Pearl Water Technologies water softener ensures durability, efficiency, and smooth DIY installation.
👉 Visit: https://pearlwater.in/water-softeners